


Automate sending an email to prospects who fill out a form

Video
Introduction
Automating email delivery to a lead who submits a form has plenty of benefits for businesses. First, it lets you send an immediate reply, which improves the customer experience and strengthens the relationship. It also saves time and streamlines sales processes by automating repetitive tasks.
Here’s a list of use cases for automating email delivery to leads. We use most of these integrations ourselves at Gemeos Webflow agency :
Form submission confirmation
Sending an automatic email to confirm receipt of a lead’s form submission is a great way to show that you’re paying attention to their needs.
Follow-up after event registration
If a lead signs up for an event you’re hosting, sending an automatic confirmation email can help boost engagement and encourage attendance.
Follow-up after an information request
If a lead asks for more information about your products or services, sending an automatic email with the requested details can help speed up the sales process.
Order receipt confirmation
After an order is confirmed, sending an automatic email to confirm it can help strengthen the relationship with the customer and build trust in your business.
Sending value-added content
Sending automatic emails with value-added content, like guides, tutorials, or tips, can help build trust with leads and keep them coming back.
In short, automating email delivery to leads can help businesses improve the customer experience, save time, and streamline sales processes.
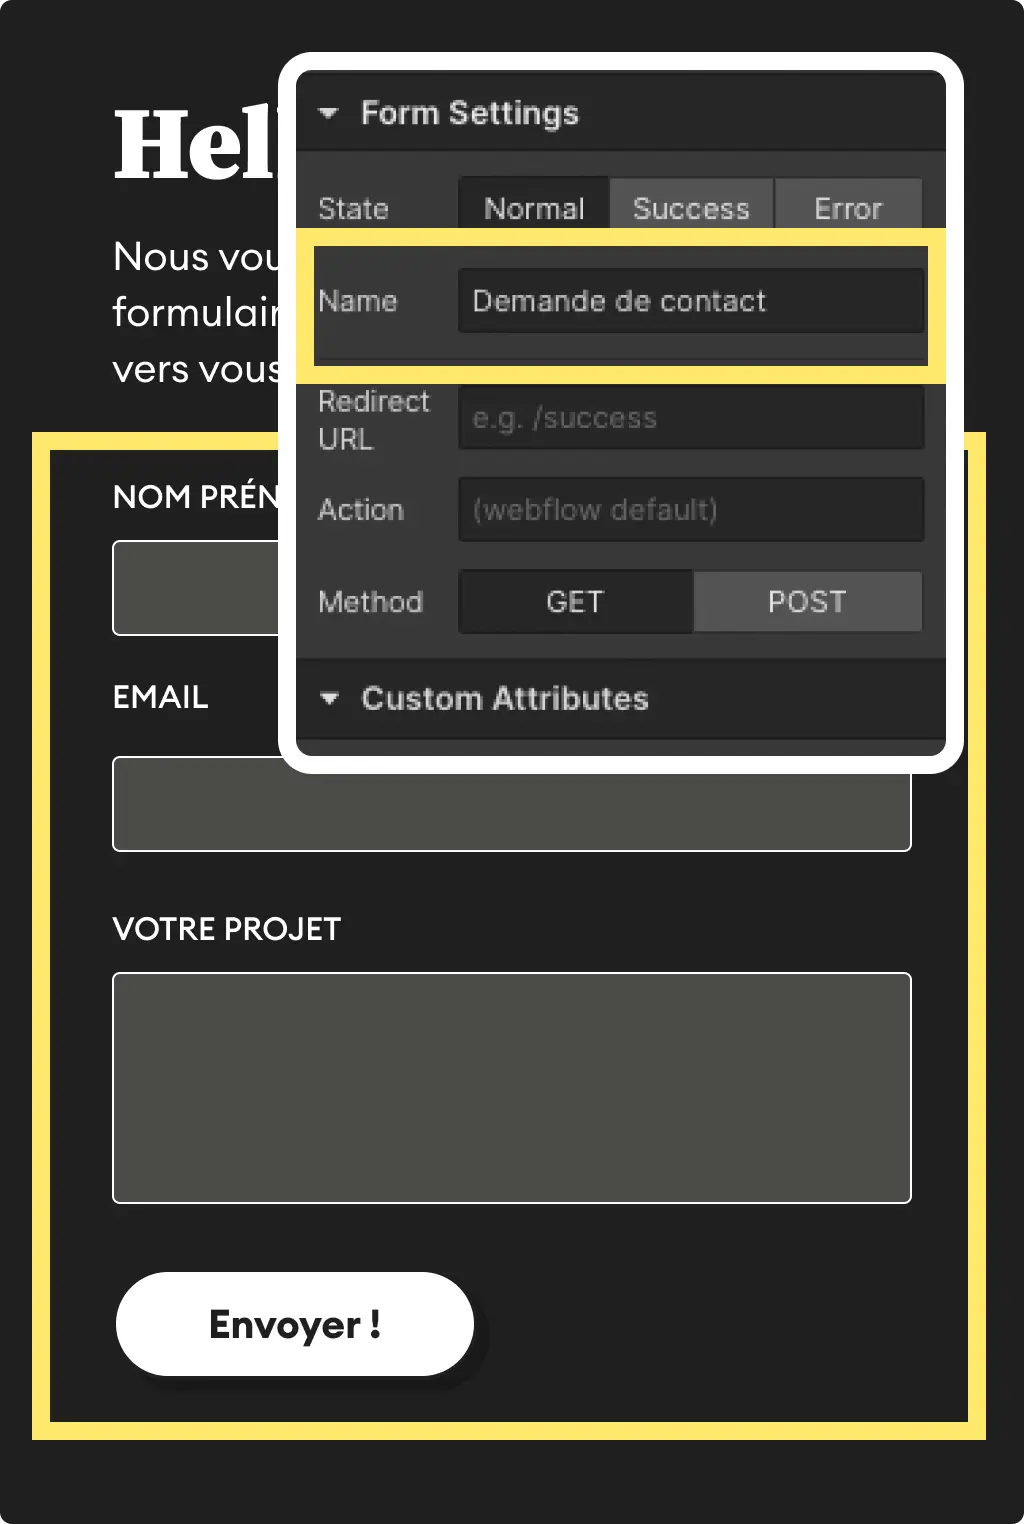
1. Add a name to your form
It’s not required, but it’ll help you find your way later. By default, Webflow names your form “Email Form.”
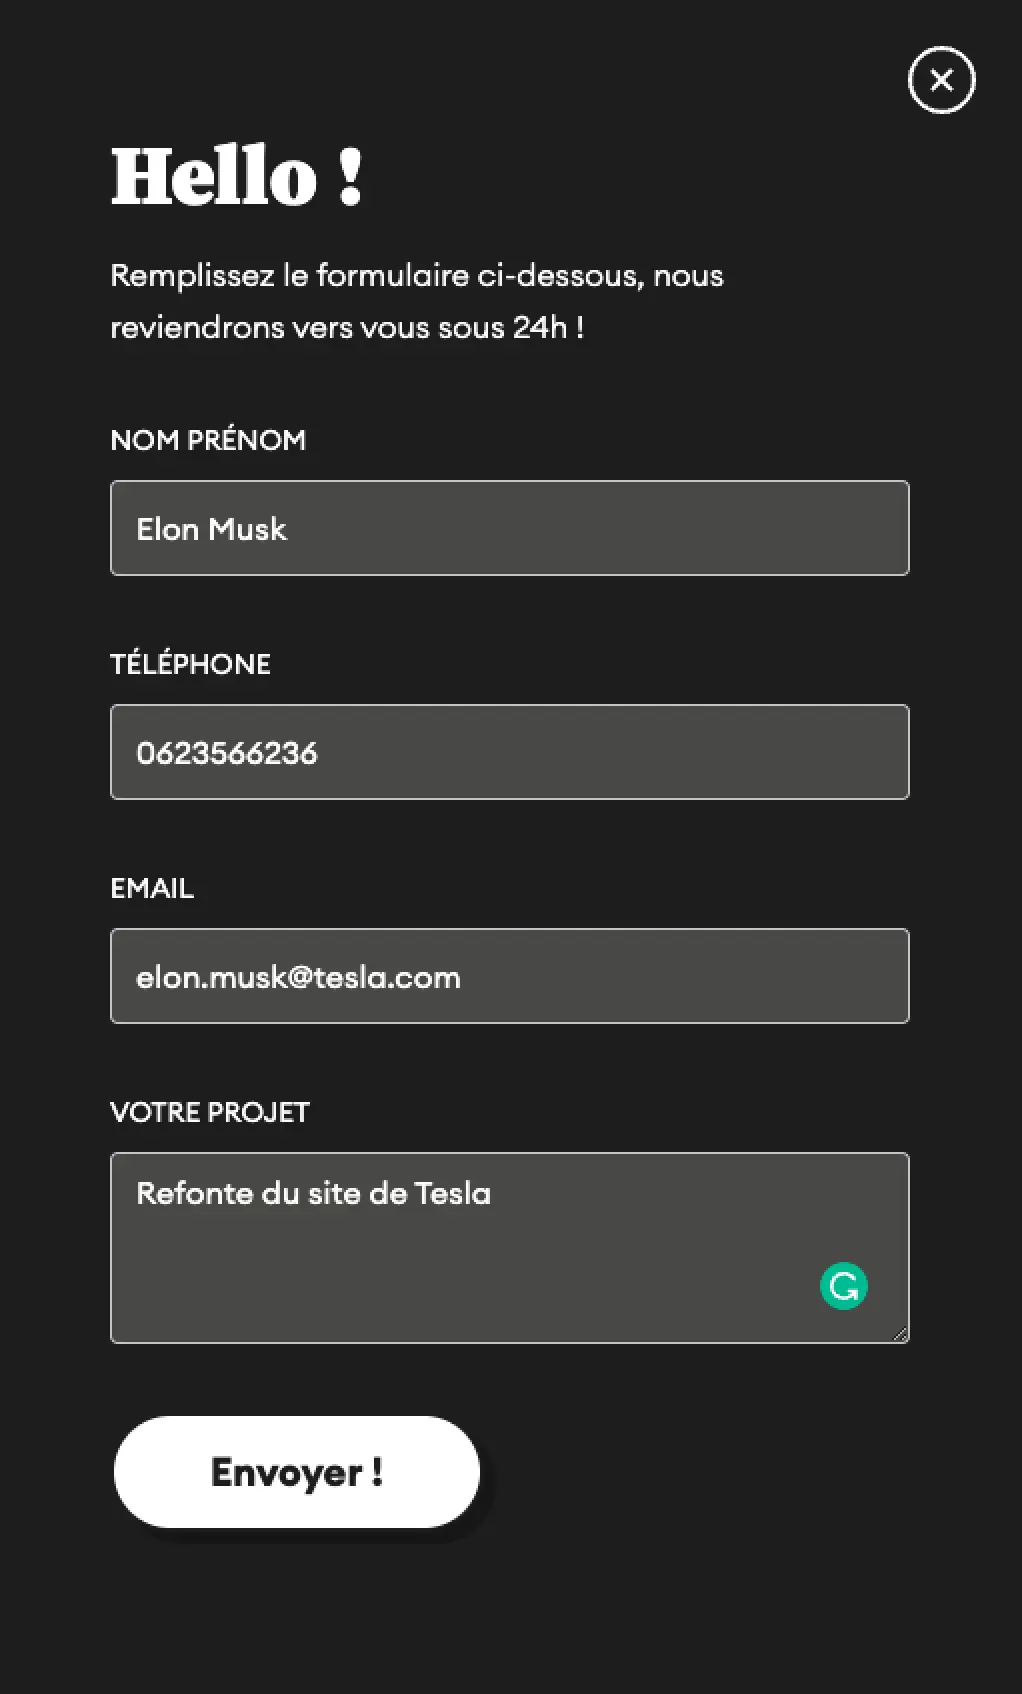
2. Submit your form once
In the published version of your site
3. Go to Zapier and create a new Zap
Create a new Zap by choosing Webflow as the trigger and selecting “Form submission.”

4. Connect your Webflow account
Select your site and your form. This is where you’ll find the form name you entered earlier.

5. Test your trigger
You should see all the data you entered when you submitted your form earlier.

6. Time to take action
Select Gmail, then “Send email” in the event field.

7. Set up your action
Recipient
Select the email field from your Webflow form in “to” to specify who the email should be sent to.

Sender and subject

Message
This is where you add your message. Don’t hesitate to use as many variables as possible to personalize your email and make it feel more personal.

8. Publish, and you’re done

Good to know
Heading
Lorem ipsum dolor sit amet, consectetur adipiscing elit. Suspendisse varius enim in eros elementum tristique. Duis cursus, mi quis viverra ornare, eros dolor interdum nulla, ut commodo diam libero vitae erat. Aenean faucibus nibh et justo cursus id rutrum lorem imperdiet. Nunc ut sem vitae risus tristique posuere.


Lorem ipsum
Lorem ipsum dolor sit amet, consectetur adipiscing elit, sed do eiusmod tempor incididunt ut labore et dolore magna aliqua. Ut enim ad minim veniam, quis nostrud exercitation ullamco laboris nisi ut aliquip ex ea commodo consequat. Duis aute irure dolor in reprehenderit in voluptate velit esse cillum dolore eu fugiat nulla pariatur.


