


Add an address field with autocomplete in Webflow using the Google Maps API
Why add an address field with autocomplete?

Better User Experience
- Ease of Use: Autocomplete can help users find and enter their addresses faster and more easily.
- Fewer Errors: It can reduce the risk of mistakes by suggesting valid addresses.
Data Accuracy
- Normalization: Entered addresses are often normalized into a standard format, which helps keep your data accurate.
- Validation: It lets you validate addresses in real time, so the information you receive is accurate.
Efficiency
- Time Savings: It cuts down the time users spend filling out forms, which is especially useful on mobile devices where typing can be a pain.
- Less Friction: It minimizes the steps needed to complete a form, reducing cart and signup abandonment.
All of that helps boost your form conversion and makes your data more reliable.
Gemeos, the Webflow agency, shows you how to do it!
Tutorial: how to add a single-field address autocomplete in Webflow

1. Create a Google Cloud Console account and go to Google Maps Platform
Follow this link to get there!
You should see a modal with your API key (see screenshot below)
Copy your API key so you have it handy — you'll need it for the next steps.

2. Add the ID "address-input" to your input in Webflow

3. Add this custom code to your page or in an embed inside your form
Make sure to replace {API key} with your API key in the first and second code blocks below.
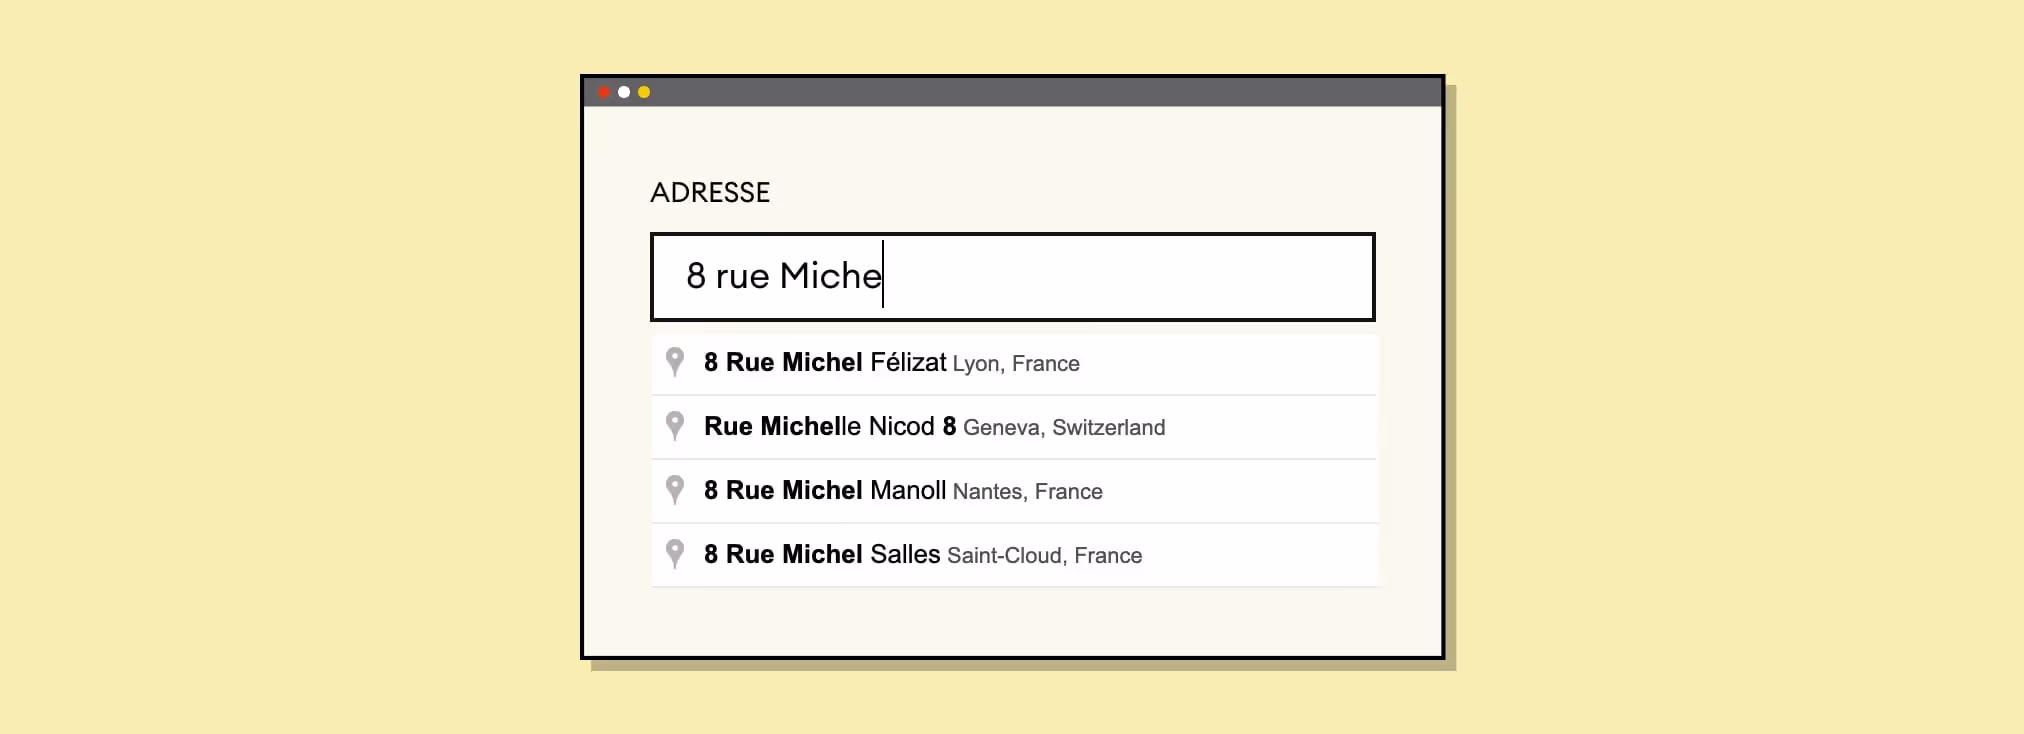
4. Publish and test the result
It doesn't get any simpler than that.

Good to know
Heading
Lorem ipsum dolor sit amet, consectetur adipiscing elit. Suspendisse varius enim in eros elementum tristique. Duis cursus, mi quis viverra ornare, eros dolor interdum nulla, ut commodo diam libero vitae erat. Aenean faucibus nibh et justo cursus id rutrum lorem imperdiet. Nunc ut sem vitae risus tristique posuere.


Lorem ipsum
Lorem ipsum dolor sit amet, consectetur adipiscing elit, sed do eiusmod tempor incididunt ut labore et dolore magna aliqua. Ut enim ad minim veniam, quis nostrud exercitation ullamco laboris nisi ut aliquip ex ea commodo consequat. Duis aute irure dolor in reprehenderit in voluptate velit esse cillum dolore eu fugiat nulla pariatur.


